


Description
Description :
- Perfect adaptation, to the root canal , to your technique and to you
- High mechanical strength
- Double tapered design
- Esthetics
Benefits :
- Double taper design:
Better adaptation to the canal without requiring further wear on the dental structure.
- Esthetics and excellent translucency:
High esthetic capacity and excellent light conductivity, helping the light curing of the cement.
- Radiopacity:
Possibility of radiographic diagnosis.
- Exclusive drill:
Specific for each size of post, leading to a standardized root preparation.
- DC-E Version (Special)(DC-E):
The DC-E version ( Special) has the same apical diameter as its corresponding DC version, but on the cervical third it shows a wider diameter that makes it the best choice for cases where there is less quantity of remaining coronal structure and for teeth with wide canals.
- High Safety:
Modulus of elasticity similar to dentin, reducing the risk of radicular fracture.
Recommendations :
Restoration of endodontically treated tooth to assist in retention of the restorative material and distribute stresses imposed on the tooth.
Step by step :
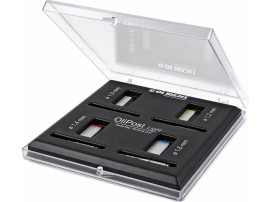
Step 1 of 10 :
![image1-3-300x226[1]](https://fgmdentalgroup.com/wp-content/uploads/2022/11/image1-3-300x2261-3.jpeg)
- Take an X-ray (periapical radiography) and check the quality of the endodontics. Select the post according to the diameter of the canal, overlapping the template over the X-ray of the tooth.
Step 2 of 10 :
![image2-1-300x200[1]](https://fgmdentalgroup.com/wp-content/uploads/2022/11/image2-1-300x2001-1.jpeg)
- Insulate the operatory field. Prioritize the use of rubber dam.
Step 3 of 10 :
![image3-300x200[1]](https://fgmdentalgroup.com/wp-content/uploads/2022/11/image3-300x2001-1.jpeg)
- Remove the gutta percha from the canal using a suitable drill or instrument, keeping 3 to 5 mm of gutta percha in the apical region, ensuring the sealing of the endodontic filling.
Step 4 of 10 :
![image4-300x199[1]](https://fgmdentalgroup.com/wp-content/uploads/2022/11/image4-300x1991-1.jpeg)
-Prepare the root canal with appropriate drills until it matches the shape of the post. Avoid unnecessary wear.
Step 5 of 10 :
![image7-300x200[1]](https://fgmdentalgroup.com/wp-content/uploads/2022/11/image7-300x2001-1.jpeg)
- Trim the coronal excess from the post, if necessary, and put it back in position to check the fitting.
Step 6 of 10 :
![image8-300x200[1]](https://fgmdentalgroup.com/wp-content/uploads/2022/11/image8-300x2001-1.jpeg)
- Apply the phosphoric acid gel (Condac 37 – FGM) for 15 seconds inside the root canal and remaining dental structure. Wash thoroughly and remove the excess water with absorbent paper cones.
Step 7 of 10 :
![image9-300x200[1]](https://fgmdentalgroup.com/wp-content/uploads/2022/11/image9-300x2001-1.jpeg)
- Use the Cavibrush Long (FGM) for application of the dual-curing or light-curing adhesive system along the entire etched root canal.
Step 8 of 10 :
![image10-300x216[1]](https://fgmdentalgroup.com/wp-content/uploads/2022/11/image10-300x2161-1.jpeg)
- Clean the Whitepost with 70% alcohol, or Chlorhexidine at 2%. Apply Prosil Silane (FGM) on the entire surface of the post and wait for it to dry.
Step 9 of 10 :
![image11-300x200[1]](https://fgmdentalgroup.com/wp-content/uploads/2022/11/image11-300x2001-1.jpeg)
- With a lentulo drill, introduce the Allcem resin cement (FGM) inside the canal or use Allcem Core (FGM) with its applicator tip.
Step 10 of 10 :
![image12-4-300x200[1]](https://fgmdentalgroup.com/wp-content/uploads/2022/11/image12-4-300x2001-2.jpeg)
- Insert the post carefully in the canal and proceed with light-curing of the cement on the surface and through the post.


0 Review for “Whitepost | Post Made Of Fiberglass Composite And Epoxy Resin.”
5 Stars
0%
4 Stars
0%
3 Stars
0%
2 Stars
0%
1 Stars
0%